Thursday, October 31, 2013

First two batches of bread: Oat bread and barley bread

As you may have already guessed from the title of this post, we made an oat flatbread and a barley flatbread this week! In most parts of the Viking world, bread was a staple of the Viking diet. (In Iceland and Greenland, cereal products such as bread were a rare treat.) There were two meals every day – a morning meal (dagverðr) and an evening meal (náttverðr) – and bread was likely served at both of them. 

If you're used to making bread using all-purpose wheat flour, oat and barley flour can take some getting used to. The texture of these stone ground flours is a bit coarser, and oat flour becomes especially dense and sticky when liquid is added. After a short-lived attempt to grind our own flours using a stone mortar and pestle (in place of Viking Age grinding stones known as a querns), we came to the conclusion that it would take us the entire semester to grind a usable amount of flour, and we opted for commercially available flours. We used buttermilk as a substitute for whey from cheese-making (thought to have been used in Viking Age flatbreads), because buttermilk contains similar bacterial cultures and is more widely available. We used an electric stove element on low heat as our heat source as space restrictions and local fire codes did not allow for us to build and maintain a cooking fire. 

The recipe we used was based on a few of different Viking flatbread recipes we found online made by historical reenactment groups and Scandinavian bread-enthusiasts. The recipes we borrowed the most heavily from were A Modern Recipe for Viking-Era Flatbread by William R. Short of Hurstwic.org, and Small Flatbreads by Skandinav i Florida. 


Flatbread Ingredients
Oat Flatbread Recipe:
1 cup oat flour
1/3 cup rolled oats
1/2 cup buttermilk
2 tbsp butter
1 tbsp honey
A pinch of coarse sea salt 

Before starting, heat a cast iron pan on medium-low heat on a stove (or over embers of a fire).


Add oat flour to the bowl.
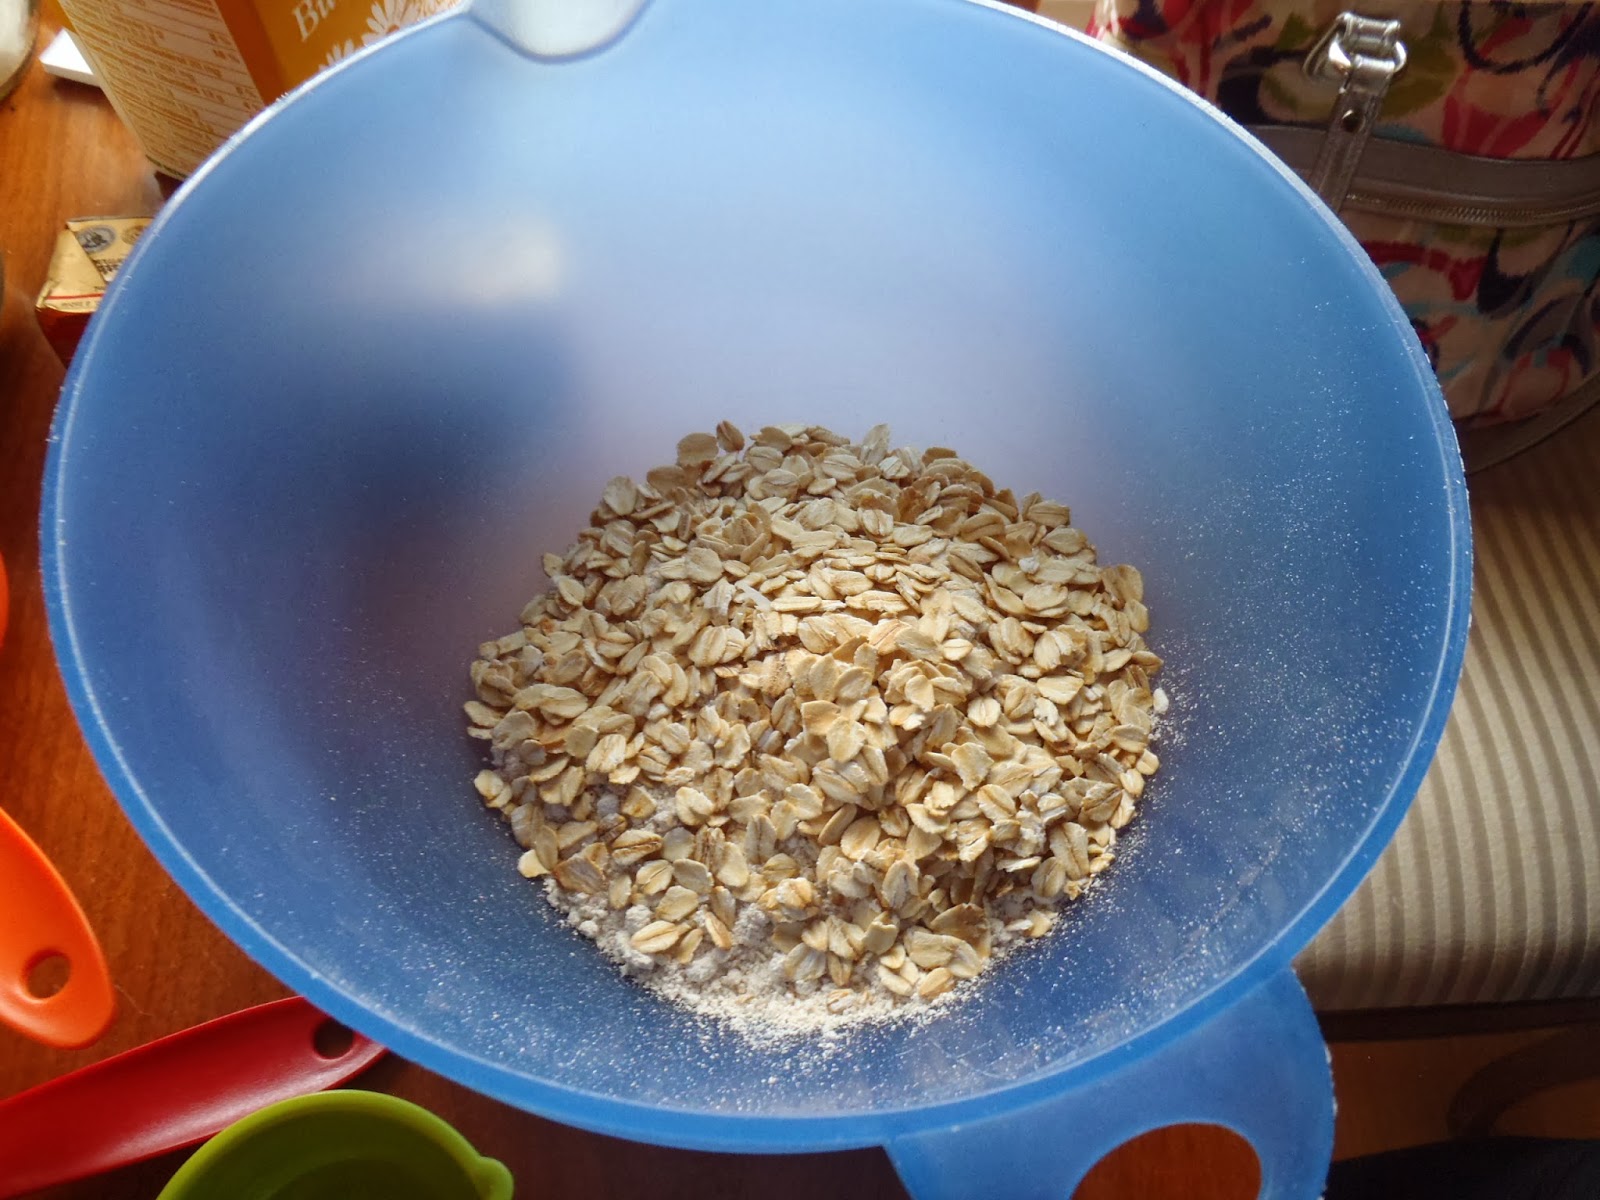
Combine oat flour with rolled oats and sea salt.

Mix melted butter, buttermilk, and honey.

Add wet ingredients into dry.

Mix all ingredients.

Form dough into balls...

...then flatten balls into circles.

Place on hot cast iron pan.
Cook both sides on low heat until brown.

For best results, eat while still warm.

Try serving with butter and honey! 

Barley Flatbread Recipe:
The barley flatbread recipe we used was very similar to the oat flatbread. The only differences are that we used barley flour instead of oat flour (obviously!), and we omitted the rolled oats. 

1 cup barley flour
1/2 cup buttermilk
2 tbsp butter
1 tbsp honey
A pinch of coarse sea salt


Barley flatbread dry ingredients.

Adding the wet ingredients.

Mix into a firm dough.
Form dough into balls.

Flatten into circles and cook in a cast iron pan.

Ready to eat!


We enjoyed the taste and texture of the oat flatbreads better than the barley flatbreads. The oat breads reminded us of biscuits or scones and they were really quite nice with butter and honey. The barley flatbreads were a finer in texture, but they reminded us of hard, dry pancakes. We also thought the barley flatbread tasted saltier than the oat flatbread, even though they used the same amount of salt. They might have been more enjoyable with a bowl of hot stew to hydrate them a little. Perhaps that was how the Vikings preferred them. 

-Jennifer


Monday, October 28, 2013

Processing Honeycomb

To minimize cost, we relied on commercial honey for our mead. However, the Vikings likely would have produced their must (what we have been referring to as the honey-water mixture to keep it simple) straight from honeycomb. The honeycomb we used was purchased from a local weekend market, as it was produced locally and therefore quite fresh. As detailed on Your Shout, Mate (2012), must would have been made using the following steps which we have copied straight from the blog:
1. Start with 40kg of good full, dripping, honey comb
2. Wrap in muslin cloth and set aside to drain for 12-24 hr
3. Transfer the raw honey into a jar and set aside
4. Crush the honey comb in the cloth and squeeze well, place a heavy stone on top to press the cloth
5. In a wooden, soapstone or clay pot, heat an equal amount of fresh spring water, by weight/volume as compared with the squeezed honeycomb and cloth (approx. 5L of water,) to the temperature of a hot drink, by placing fire heated hot rocks into the water to heat the water above the wax melting point (60-65 deg. C)
6. Remove the rock(s) and suspend the cloth with squeezed honeycomb into the water. Wrap the stone or clay pot to keep warm
7. Remove the muslin cloth and spent honeycomb from the must and squeeze dry, set aside to cool then strain through cloth and straw/juniper branches to remove the hard wax
 As we did not have many of this traditional materials, we altered these instructions slightly:
  1. Purchase a small piece of honeycomb.
  2. Wrap the honeycomb in cheesecloth and drain for 12 hours (not entirely necessary, as the packaged honeycomb already has time to drain).
  3. Remove the raw honey that has drained out.
  4. Using a can wrapped in plastic wrap, crush the honeycomb.
  5. Heat spring water (approximately the same weight as the honeycomb) in a pot on the stove until it is hot to the touch, but not burning.
  6. Transfer in the honeycomb and cheesecloth, cover with a lid, and keep on minimum heat for 20 minutes.
  7. Remove the cheesecloth and honeycomb. 
  8. Allow the must to cool and then strain through a  folded piece of cheesecloth to rid the mixture of any remaining wax.  
 Overview of Ingredients, Materials, and Steps:
Cheesecloth and the packaged honeycomb (4.3" x 2.5" x 1.5").
The honeycomb had been sitting for a few weeks, so it was mostly drained already.
We wrapped the honeycomb in cheesecloth and allowed it to sit for approximately 12 hours.

This is some of the honey that drained out already. Note the pieces of wax and other particles present, unlike the pasteurized honey.
The instructions called for a "heavy stone," but we used a can of soup instead. This was somewhat unnecessary, as the pressure we placed on it did most of the work. 
We thought the honeycomb had drained quite a bit already, but after crushing it a lot more raw honey emerged!

We used a donated digital postal scale to measure
the weight of our honeycomb and water, both of
which were 213 g.

We brought the water to a hot temperature, placed the honeycomb and cheesecloth inside, and allowed to sit covered on minimum heat for 20 minutes.
Note how dark the mixture is after 20 minutes, much unlike the must from pasteurized honey.
After allowing the must to cool, we strained it through the cheesecloth to remove any remaining wax.
The end result had way more flavour than the pasteurized honey must. Approximately 426 g of must...far from the 40 kg required. 

Sunday, October 27, 2013

An Update on the First Batch of Mead

Turns out our first batch was more of a trial run. We learned that the raisins should have been added earlier, as there was no need to ferment the mead once transferred into the carboy (it was supposed to be consumed at that time). Also, as of today, we now have a hydrometer to measure alcohol content (!!!), though measurements need to be taken at the beginning and end for accuracy. This means that we will only be able to accurately gauge alcohol content for the unpasteurized honey batch, but we still did the end reading for this one for a general comparison. For this reason, we will be adding in an additional experiment, specifically focusing on the effectiveness of raisins as an indicator of fermentation, and as an excuse to measure the start gravity reading of a pasteurized honey mixture. Check back next week for more on this experiment!

Anyway, back to the first batch of mead.

We let the mead ferment for several days since we could not meet during the week, though apparently it can be consumed as of day 4 or 5 according to our resource person. Here is how it looked over the course of the week:

Day 2

Day 3

Day 4

Day 5

Day 6

Day 7

Day 8

As one of the group members has brewed wine in the past, she was surprised to note that a thick yeast cake did not form (a picture will be included in the post on the raisin experiment as a large one developed within hours!). We wonder whether or not something impacted the fermentation process. Perhaps the yeast was not rehydrated for long enough, or the temperature was too cold? It will be interesting to compare how our next batch of mead responds. While the mead did have an alcoholic taste (according to our resource person, short mead can reach 3% by day 4 or 5), we were unable to gauge the exact percentage. We did, however, try to get a rough reading.

Tester tube with a hydrometer, used to measure gravity/alcoholic content.
A hydrometer is used to measure gravity (by placing the device in the tester tube, spinning it to rid any air bubbles, and recording the number at surface level) before and after fermentation. While we were unable to measure the gravity before as we lacked this device, a group member began an additional batch of pasteurized honey mead and was able to measure the gravity of this mixture which was 1.080 and corresponds with the 10.8% alcohol mark. The end gravity reading of our first batch was 1.040, which corresponds with the 4.8% alcohol mark, on day 8. Alcoholic content is determined by subtracting the start and end readings: 10.8% - 4.8% = 6%. Thus, our batch is likely around 6%, but unfortunately this can not be confirmed. We also wonder how accurate our readings were, as the instructions for the device indicated that the hydrometer was most accurate if the mixture was 60°F and we were unable to check this.

Initially, we were going to siphon the mixture from the primary container to the carboy and this proved to be more difficult than expected. Instead, we strained it through folded cheesecloth, though we did not come across this step in any of the blogs that covered traditional mead making. As we soon learned, it was mostly unnecessary, as there was no yeast cake remains and the post-fermentation sediment was far too fine to effectively remove.

Straining sediment...unsuccessfully.
Sediment still present. However, it will mostly sink to the bottom if left sitting for long enough, allowing the mead to clear slightly.
Enough with the sediment, let's focus on the taste and colour. As you can see, the mead turned out a very pale yellow. A few group members indicated that they were used to mead that was darker in colour and dryer in taste. As we later learned through working with the honeycomb, this could have been due to the fact that it was made using pasteurized honey, but we'll discuss this in more detail in the post for that experiment. The fact that we choose to use a champagne yeast accounted for the fact that it had a light and sweet taste, with slight carbonation. We decided it would make an excellent dessert wine.

One of our group members made good use of the mead by bringing it to a Halloween party. As the gravity was above 1.006, we were unable to bottle it since it was likely to explode!

- B and Jo


Saturday, October 26, 2013

Exploring Our Peers' Experiments: Mead with a Side of Meat

This weekend we were given a short assignment: explore some of our peers' blogs and reflect on their projects as well as any similar challenges that may have come up. Naturally, we checked out "Mead with a Side of Meat" to see how our projects differed. While they chose to focus on meat instead of bread, we were able to compare the recipes, methods, and materials used to make mead.

  1. This group has found far more information regarding the origins of mead (which is earlier than the Viking Age, as we also noted), which was interesting for us to learn about.
  2. We both seemed to face challenges in regards to finding traditional Viking materials. However, while we were able to use modern alcohol making supplies, the other group creatively substituted a plastic jar as a primary fermentation container and a balloon as a decanter. It will be neat to later read how this impacted their mead (in regards to flavor and alcoholic content), if at all.
  3. While they are only doing a singular batch which is fermenting over several weeks, our focus is more so on how different forms of honey ferments, thus leading us to choose a short mead recipe. Again, as mentioned above, we look forward to comparing how this impacts the mead. 
  4. A couple of things that brought up questions for us from their blog was how they used the raisins (whether they were used to add flavor or to track the fermentation process), what kind of yeast they used in their mead, and if they heated the honey and water together or if they just mixed it by shaking. The reason we ask these question is because all of these things effect the fermentation process.
 Our ability to compare projects was slightly limited as not all the steps were detailed. We look forward to contacting the group regarding our questions to learn more!

-B, J, and Jo

Friday, October 25, 2013

Anticipated Challenges: Mead Edition

While we claim to be making Viking mead, we anticipate many challenges, limiting our ability to achieve an authentic version. This is due to limitations pertaining to time frame and cost, as well as lack of access to traditional materials and resources.

  1. As will be discussed in more detail along with information regarding our honeycomb experiment, traditionally acquiring honey would have involved maintaining a hive and processing honeycomb (Your Shout, Mate 2012), or being an elite and receiving it as a form of currency, as previously mentioned in another post (Ward 2013). We chose to purchase packaged honey from the store, as the cost of purchasing enough honeycomb to make a batch of mead exceeded our budget—the small piece that we purchased for the experiment (approximately 4.3" x  2.5" x 1.5") was $7 dollars! This may impact our experiment as the traditional recipe uses a ratio of drained honeycomb to spring water which may lead to a weaker mead mixture (Your Shout, Mate 2012) and less naturally present yeast; however, our decision to test the use of raisins to gauge fermentation as a separate experiment as well as pasteurized honey again minimized the presence of additional yeasts (Your Shout, Mate 2012). That being said, as we added store-bought champagne yeast specifically for making alcohol, this likely accounted for that issue as well as created another due to the large amount of an effective yeast, as explained below (4).
  2.  Since the Vikings would not have had access to a food-grade plastic bucket or a stove, they would have used a container made out of materials such as soapstone or wood, and the mixture would have been warmed over a fire or using hot rocks (Your Shout, Mate 2012). Though we added champagne yeast as discussed above, the use of a wooden bucket would have allowed for the transfer of yeast from batch to batch. As we sanitized all materials before use and had not made mead before, we were unable to achieve this. Additionally, stones from the fire-pit used to heat the mead mixture, would have added ash and therefore potassium (Your Shout, Mate), which is missing from our batch and used by present-day alcohol makers to regulate fermentation.
  3. While we're making a short mead that ferments quickly due to the large amount of champagne yeast relative to the mead mixture, the Vikings likely allowed their mead to ferment for longer (Your Shout, Mate 2012). For this reason, the alcoholic content and taste of the mead may be different.
  4. Hopefully covered in a future blog post, the often cold temperature of the apartment in which the mead is being kept may not be conducive to fermentation. As mentioned in the post entitled "Background Information on Viking Mead," since it was made in the home, learning more about the structure and layout of Viking houses may help us to speculate whether a warmer temperature was maintained. 
- Jo

*This blog post is based on information from our project's proposal, which was also written by B and J.*
Bibliography

Unknown, 01/01/2012, A True Viking-Style Mead (Mjöð), Your Shout, Mate. Available: http://yourshoutmate.blogspot.ca/2012/01/truevikingsytlemeadmjo.html [Oct 9, 2013].

WARD, C., 10/09/2013 last update, Alcoholic Beverages and Drinking Customs of the Viking
Age, The Viking Answer Lady. Available: http://www.vikinganswerlady.com/drink.shtml [Oct 9,
2013].

Background Information on Viking Mead


viking-drinking
Image source: http://insiderspassport.com/mead-ancient-elixir
We seem to have jumped into our experiment without providing a little more background information on some crucial information. Please read on to learn more about the importance of mead to the Viking people, who participated in the process of making it, and what evidence is available to support these assertions.

Mead is a fermented mixture of water and honey (sometimes referred to as "honey wine") with a long history dating back to ancient civilizations, such as Mesopotamia (Your Shout, Mate 2012). In the Old Norse language, this alcoholic drink was referred to as "mjöð" (Ward 2013), and it was typically made in the home by women (Graham-Campbell 1980, p. 122124; Your Shout, Mate 2012; Kaland and Martens 2000, p. 45). In fact, this role is said to have been reserved for the "lady of the house" (Your Shout, Mate 2012). Mead was not your average beverage: it was often served at celebrations as well as ceremonies (Pollington 2011, p. 20) and considered "sacred" (Your Shout, Mate 2012). Mead was likely held in such high regard as it was difficult to acquire (Your Shout, Mate 2012). Ward (2013) states that honey was even used as a form of currency, and therefore often fell into the hands of the elite as a way of paying taxes or other debts. A more common alcoholic drink would have been an ale, likely made from barley which was a staple to the Vikings in many areas (Ward 2013). Though, as will be covered later, barley was a scarcity in some places thereby raising its value in that context (Zori et al. 2013).

Due to limited material evidence, textual sourcessuch as Viking sagas and mythology (Ward 2013) as well as records and poems from nearby regions during the Viking Age (Your Shout, Mate 2012)are key to understanding the role of mead (and alcohol more generally) in Viking life. For instance,Ward (2013) references "Hávamál (Sayings of the High One)" which relays Óðinn's (a major Viking god) advice on drinking etiquette, specifically to avoid drinking too much. Whether or not this was followed is another story. Ward (2013) also cites a historical document discussing Germanic peoples and alcohol, which alludes to feelings of indifference toward frequent intoxication. In addition, Beowulf, a famous Anglo-Saxon poem, mentions the presence mead specifically and another poem entitled Maxims I even discusses how it was served: much like the production of mead, women were assigned to this role (Ward 2013). This is further supported by the presence of items used to serve mead in the graves of Viking women (Ward 2013).


Check back on Monday for some more information on how mead was traditionally made and served, an update regarding our first (slightly problematic) batch of mead, a review of our peers' Viking experimental archaeology projects, as well as our next "experiment day" which will focus on extracting honey from honeycomb and making a few types of bread.

- Jo

*This blog post is based on information from our project's proposal, which was also written by B and J.*

Bibliography

GRAHAM-CAMPBELL, J., 1980. Home Life. In: The Viking World. USA: Ticknor & Fields, pp.113-129.

KALAND, S. H. H. and MARTENS, I., 2000. Farming and Daily Life. In: FITZHUGH, W. W. and
WARD, E. I., eds, Vikings: The North Atlantic Saga. Washington: Smithsonian Books, pp. 42-54.

Pollington, S., 2011. The Mead-Hall Community. Journal of Medieval History, 37(1), pp. 19-33.

Unknown, 01/01/2012, A True Viking-Style Mead (Mjöð), Your Shout, Mate. Available: http://yourshoutmate.blogspot.ca/2012/01/truevikingsytlemeadmjo.html [Oct 9, 2013].

WARD, C., 10/09/2013 last update, Alcoholic Beverages and Drinking Customs of the Viking
Age, The Viking Answer Lady. Available: http://www.vikinganswerlady.com/drink.shtml [Oct 9,
2013].

ZORI, D. et al, 2013. Feasting in Viking Age Iceland: sustaining a chiefly political economy in a marginal environment. Antiquity, 87(335) pp. 150-165.

Monday, October 21, 2013

Dealing with Fruit Flies

(The following is a quick update from the group member who is housing the fermenting mead.)

I've noticed that fruit flies are especially attracted to the mead mixture even though it's covered. As someone who has made wine and grown wheat grass, this is nothing new. A few years ago, I learned how to make an effective trap to minimize this annoyance.

Fruit Fly Trap Instructions:
  1. Take a large mason jar.
  2. Fill 1/4 of the mason jar with apple cider vinegar.
  3. Fill the mason jar to the half-way point with water.
  4. Include a few drops of dish detergent (Sunlight seems to work best).
  5. Place in the affected area. 
This trap works by using vinegar to attract fruit flies, encouraging them to fly into the jar and near the water, where they become stuck to the detergent and subsequently drown.

Though I have found no reference to dealing with fruit flies in any of the blogs of academic literature, I wonder if the Vikings suffered from similar issues, and whether or not the flies were considered problematic. If so, it would be interesting to know how they dealt with this aspect, if at all.

-Jo

Saturday, October 19, 2013

First Batch of Mead

We started our first batch of mead today! 

Through planning for this project, our group learned that there is a large range of mead recipes available on the internet; however, each one seemed to similarly involve mixing water, honey, and sometimes yeast. Due to the short period of time in which our experiments must take place, we decided to use a short mead recipe, which is ready in a little over a week. More specifically, we combined various suggestions and ratios on the internet as well as from a resource person that our professor connected us with. Furthermore, we discovered an excellent blog site (http://yourshoutmate.blogspot.ca/2012/01/true-viking-sytle-mead-mjo.html), which included much detailed information on Viking mead. While we were unable to alter our recipe to include all the techniques traditionally utilized, we were inspired to attempt to explore a few, as will be discussed in future posts. One element that we were able to include this week from the blog, is having the "lady of the house" make (or at least "supervise" the making of) the mead (Graham-Campbell 1980, p. 122124; Your Shout, Mate 2012), as one of the group members who processed the mead mixture is the primary tenant of her apartment where it was made. We like to think that counts.

ANTH 398 Mead and Bread Group's Tentative Recipe for Short Mead:
  1. Sterilize all materials (mixing spoons, primary bucket for fermentation).
  2. Bring 1.5 liters of spring water to a boil. 
  3. Take pot off of the element and add 1 kg (approximately 2.2 pounds) of honey.
  4. Mix thoroughly. 
  5. Pour mixture into the primary container for fermentation. 
  6. Add 1.5 litres of cold spring water.
  7. Mix thoroughly. 
  8. Rehydrate yeast as per instructions on the packet. 
  9. Add yeast to the honey and water mixture.
  10. Cover with a towel to protect the mixture from fruit flies and dust. 
  11. Let stand for one week. 
  12. Siphon into another container to filter out post-fermentation debris.
Overview of Ingredients, Materials, and Initial Steps: 

For the first experimental batch we used pasteurized honey, as impurities such as wax have already been filtered out, thus saving us a step.While a variety of yeasts can be used to make mead, we choose to use a champagne yeast at the recommendation of an employee at a wine making store as well as our resource person, as it is considered to be an effective and reliable form. We used spring water as it is specifically called for by many mead recipes, since tap water sometimes contains additives which may impact fermentation.What is missing in the photographs below, is the cleaning of the primary container for fermentation as well as other materials using potassium metabisulphite, which is thought to be crucial to rid any bacteria which also may alter the process of fermentation. Interestingly, this was also an additive that was used by the Vikings, transferred in via ash (Your Shout, Mate 2012). Lastly, we decided to use a bucket as the primary fermenting container, as the Vikings would have likely used a bowl made out of soapstone or other common materials (Your Shout, Mate 2012).

Our Materials and Ingredients: Pasteurized honey, champagne yeast, Spring water, raisins ( explained next week, for step two), and a large pot. (Not shown is the primary container for fermentation, a large food grade plastic bucket.)

Adding honey to the heated water.
Pouring the honey-water mixture into the bucket.

Mixing cold spring water into the mixture.
Activating the yeast.

Rehydrated yeast.
Adding the yeast into the cooled honey-water mixture.
Mixture ready for fermentation. Note the foaming on the surface, which indicates that the yeast is working!

Unfortunately, we were unable to make bread this weekend, but our next "experiment day" post should be packed with pictures of tasty flatbreads as well as an update on the mead!

-B & Jo

Bibliography

GRAHAM-CAMPBELL, J., 1980. Home Life. In: The Viking World. USA: Ticknor & Fields, pp.
113-129.

Unknown, 01/01/2012, A True Viking-Style Mead (Mjöð), Your Shout, Mate. Available:
http://yourshoutmate.blogspot.ca/2012/01/truevikingsytlemeadmjo.html [Oct 9, 2013].

Tuesday, October 15, 2013

First Step

Hey all!

So we have completed our first step! We've figured out we are going to make two short meads using pasteurized and unpasteurized honey that will ferment for approximately one week, as well as 3 flatbreads and a fermented rye bread. We've found some recipes we want to use and are on our way to purchasing our ingredients. 

By completing these experiments we intend to answer the following questions:

1) How does using pasteurized or unpasteurized honey affect the preparation of mead prior to fermentation in regards to duration, ease, and effectiveness?

2) How difficult is it to extract honey from a honeycomb using traditional methods?
3) What are the differences between flatbreads made of rye, oat, and barley flours?
4) What are the differences between a rye flatbread and a rye bread leavened with a fermented starter? 

Tentative Project Schedule:

Task
Proposed Completion Date
Start the first batch of mead and make oat flatbread.
Weekend of October 19th and 20th
Analyze and record results of the first batch of mead, as well as experiment with extracting honey from honeycomb. Make rye flatbread.
Weekend of October 26th and 27th
Start the second batch of mead. Make barley flatbread.
November 1st
Analyze and record results of second batch of mead. Compare the first and second batch of mead. Make fermented yeast rye bread. Compare all of the breads made. Prepare to share the mead and bread on November 8th.
November 7th

Stay tuned for more progress updates on our experiments!

-B & Jo

Friday, October 4, 2013

Hello!!

Hey all!!
We are a group of three University of Victoria girls who are starting a blog for our Viking Anthropology class. We will be blogging about our process of creating Viking Age mead and bread. So stay tuned for updates on our progress!

-B